My Journey Of Building Graphics Rendering Engine Using Vulkan SDK | Week 4
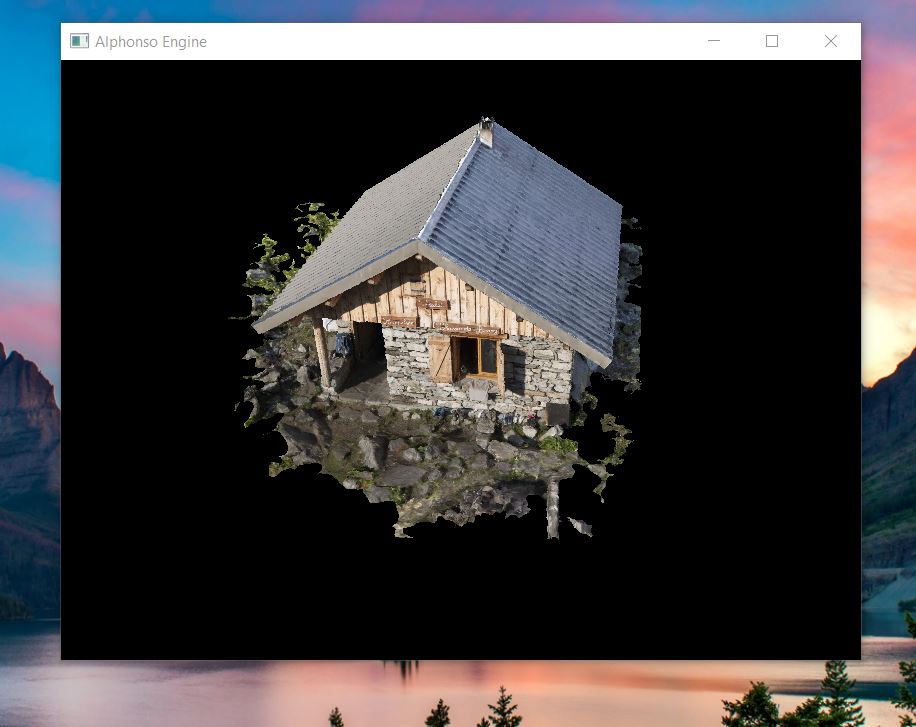
Last week we had basic Triangle on the Screen but This week We have 3D textured chalet model which can rotate.
Howdy Everyone! If you’re regular visitor and here to see my progress on this project, I am glad to see you here. If you’re new visitor, You might like to start from my first blogpost when I started working on this project from scratch. Thanks for visiting.
Allright, so during my last 1:1 meeting with my Professor Dr. Varcholik, He suggested me to either make significant progress or Switch framework if Vulkan is becoming too complex for this PPP. The amount of hours I was investing wasn’t getting translated into actual results.
During this week, I spent most of my time trying to make Index, Vertex & uniform buffers attach correctly to Vulkan-HPP pipeline that I’ve created. In the debug mode, I can see all vertices and indices loading correctly and reaching to Command buffer stage. Even my drawIndexed() method shows correct indices count but looks like there might be something small that I am missing while creating entire pipeline hence I had hard time figuring out bug in my Renderer Class.
But as we have time limit constrain on showing result, I have decided to switch to C-style Vulkan API rather than using Vulkan-Hpp. I am following the excellent tutorial published on Vulkan-tutorials and Sascha Willem’s Github repository. I am using Starter code from Vulkan-Tutorials.
So lets see what we’ve accomplished so far.
Create Swapchain from logical device.Create Image Views.Create Primary Render PassCreate Vertex and Fragment shaders in GLSL and Compile it to SPIR-VCreate Graphics Pipeline to represent Entire state.Create Command Pool.Create Command Buffers.Create Synchronization primitives.Create depth attachment which will go into render pass.Create Uniform buffers – Descriptor Set Layout and PoolCreate Vertex and Index buffers to load data directly from 3d modelCreate commands for each command buffer to render cube.Implement Texture Image, Texture image view along with sampler- Implement Camera and Keyboard input support ( In Progress )
Based on the decision of Prof. Varcholik, I will continue working on this project as per his guideline.
btw, Feel free to visit my GitHub repository to checkout my project and download code files.
Link to This Project’s GitHub Repository
You can go to “releases” section on my GitHub repo and download zip file under tag “Week_IV_Progress“. So You can look into the code which I’m referencing here.
Resource Descriptors are important to avoid wastage of memory. In our case, we have set up Uniform Buffers to store transformation matrices and have vertex shader access them through descriptors.
There are multiple steps involved while creating Uniform buffers. First we specify descriptor layout during pipeline creation, Then we allocate descriptor set from descriptor pool and finally we bind the Descriptor set.
Looking at the code, All new changes follow the same design principle we are using since beginning. we have new methods with the same names as tasks in our InitializeVulkan() method. the first one is createDescriptorSetLayout() which we are calling after completing render pass. We have 2 different bindings for Descriptor set layout. One for Uniform buffers layout and another one for SamplerLayout which we are using for texturing. We have also created UniformBufferObject Structure which has model, view and projection matrices.
Second method is createUniformBuffers(). This function creates uniform buffers whose size equal to the number of swap chain images.
Third method is createDescriptorPool(). We have descriptor pool of size 2 like what we have for Descriptor sets to hold Uniform buffer object & combined image sampler. In the next step we have created Descriptor Set. in createDescriptorSet() method, Descriptor sets cannot be created directly. We need to allocate them on the descriptor pool. Once we created descriptor sets we need to loop through each of those to populate them. vkWriteDescriporSets() method is used for populating.
Once we create descriptor sets, they need to bind with the Command Buffers. so inside our createCommandBuffer() method, we call vkCmdBindDescriptorSets() method to bind descriptor sets to each command buffer.
Now moving to the texture implementation, this task is divided into smaller subtasks viz., Creating image object from staging buffer and bind it to GPU memory, Use Image loading library like stb_image.h to fill texels, create image sampler & create combined image sampler to sample colors from texture.
createTextureImage() method loads texels that we’ve created from texture stored in the Assets directory and binds staging buffer memory to device memory. we have created separate createImageView() method as it can be reused if we are having more than one textures. createTextureImageView() simply calls createImageView() method with vkImageView we’ve created for Texture, format and aspect flags along with it. We have another reusable method called createImage() which handles image creation by filling vkCreateImageInfo struct which we have passed from createTextureImage() method.
Layout transitions are handled by pipeline barrier. Layout transition involves recording and executing command buffers. so we have created helper functions beginSingleTimeCommands() and endSingleTimeCommands() . These functions are called by transitionImageLayout() function at the beginning and end. Barriers are mostly used for synchronization purpose so we need to specify which types of operations that involve the resource must happen before the barrier, and which operations that involve the resource must wait on the barrier. vkQueueWaitIdle() is used for synchronizing before we free command buffer. This is the chalet model rendered with texture on it.
Next Week Task:-
Next week we have progress update in class so I am aiming to complete this pending camera task and move to lighting section.
I hope that you’ve found this dev diary informative and useful. Feel free to comment down below on what do you think and also if you have any questions or requests, You’re most welcome! Stay Tuned!
Thanks for visiting. Have a great day ahead.. 🙂